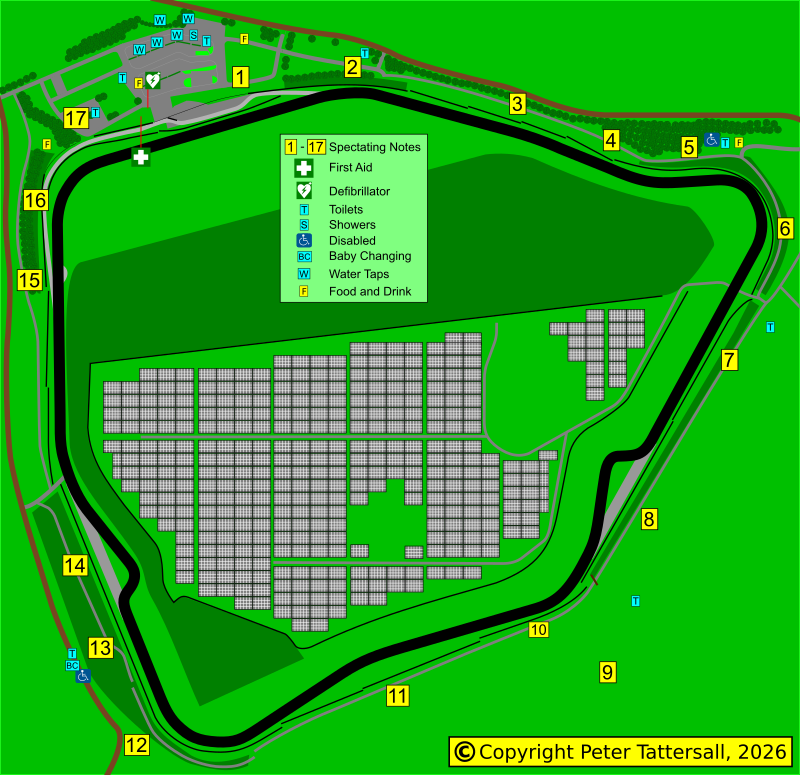
Aside from the pits and associated pit entry/exit, the spectator can watch from any point of the outside of the circuit. Some parts are more popular than others. Camp, for instance, provides a wide raised viewing point only a short walk from that paddock. Just a little further a walk in the opposite direction takes one to Quarry, where spectacular action is at its most likely.
With parking available between Camp and Gooch’s, and also between Quarry and the Esses, spectators can watch the action from almost anywhere. While some points can get a little tight, especially between Quarry and the Esses, with the full circumference to walk there is usually somewhere for everyone.
On my most recent visit to the circuit as a competitor, I decided to run the perimeter of the circuit; it was a gloriously sunny day and I had plenty of pent-up energy to get rid of in order to calm myself down in time for my own qualifying session. I also had plenty of time, or so I thought…
I ran in an anticlockwise direction from my caravan in the paddock, close to the Tavern. My first sight of the circuit was from the wide embankment overlooking Camp and the pit entry, which already was tempting me to stop and enjoy the racing. I gently plodded through the open spaces alongside Dean Straight and past Bobbies towards Gooch’s, where I saw a Caterham approaching. Then another and several more. Hold on, I drive a Caterham. They must have been called early!
At least I knew that there were two Caterham sessions and mine was the second, but I now had twenty minutes to get back, recover, shower, change and line up. The plod became a serious run and I’m sure it was uphill all the way back along this flat terrain; I’ve had a similar experience running on a beach!
Of course, I now hit the narrower confines where spectators were more tightly packed together, but I was able to make decent progress as the Caterhams kept appearing on their successive laps. The views were still great, but I was somehow less interested.
I was fit to drop as I arrived in the paddock, only to be told that the first Caterham session had been moved forward, slotting another championship between that and ours. So I survived, having learnt (yet again) to be more careful with my time management. Incidentally, our session was then seriously delayed due to a thankfully minor on-track incident, to such an extent that I could have walked the perimeter and still had plenty of time.
| 1. Pit Exit Not too much racing to see, as the circuit action is hidden by the pit and exit lane. | 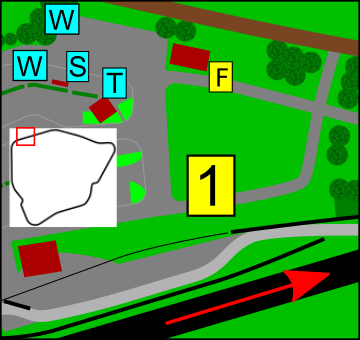 |
 The pits and pit wall. The pits and pit wall. | 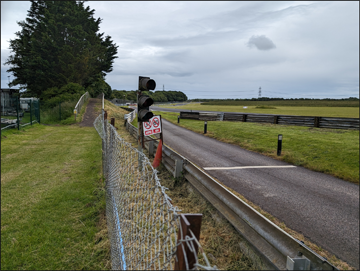 The pit lane exit, where the taller can crane to watch the cars negotiate Folly at high speed. The pit lane exit, where the taller can crane to watch the cars negotiate Folly at high speed. |
 Looking back at the paddock. Looking back at the paddock. | |
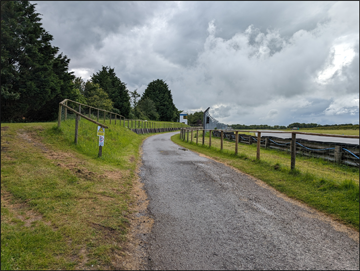
| 2. Folley A narrow embankment affords views over Folly and towards Avon Rise. While only narrow, those wishing to move further along the circuit can usually get by, with easier access from the other side of the ridge which also passes a toilet block. This section soon drops down ground level. |  |
 Continue from the pit exit a short walk to this rise, where you can look back at Folly. Continue from the pit exit a short walk to this rise, where you can look back at Folly. |  Looking back to Folly. Looking back to Folly. |
 From the start of the embankment, overlooking the pit exit lane From the start of the embankment, overlooking the pit exit lane | 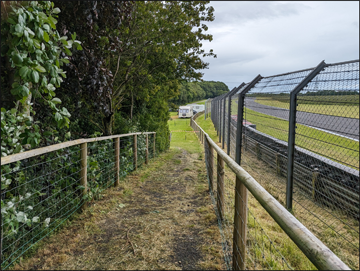 The drop down to ground level. The drop down to ground level. |
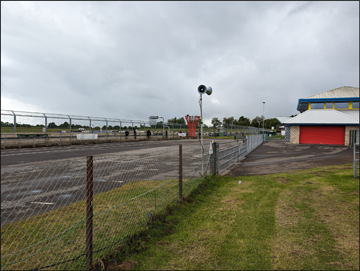
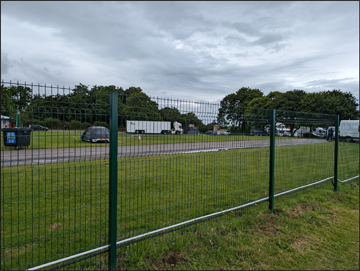
| 3. Folly to Avon Rise Coming down from the embankment, turn left and go back on yourself for the toilets, which include disabled facilities. Continuing towards Avon Rise, the viewing is from ground level and so not spectacular. Also along here is spectator parking and paddock overflow. | 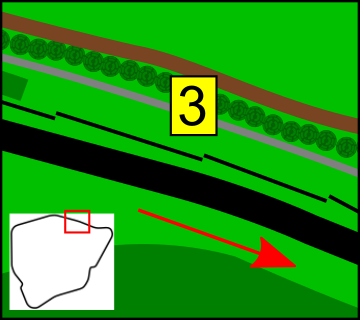 |
 Straight ahead is Avon Rise. Turn left for the toilets. Straight ahead is Avon Rise. Turn left for the toilets. | 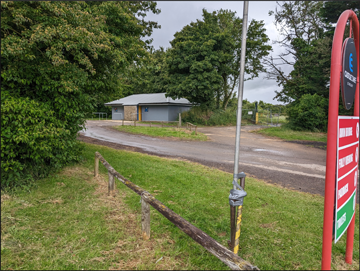 The toilet block, with disabled facilities to the left of the block. The toilet block, with disabled facilities to the left of the block. |
 The views from ground level are not spectacular, but you can still watch while heading towards Avon Rise. The views from ground level are not spectacular, but you can still watch while heading towards Avon Rise. | 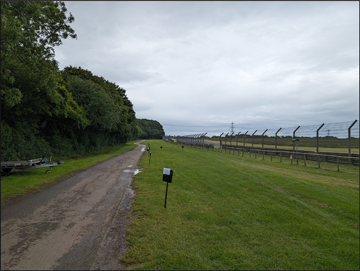 The wide space includes an access road. The wide space includes an access road. |
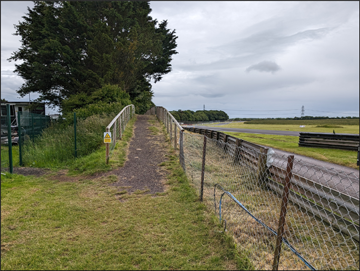
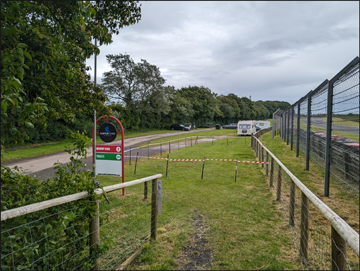
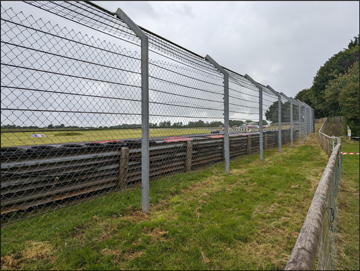
| 4. Avon Rise Approach A wide expanse with ground-level views of the racing. At the end, there is a split for raised viewing on the right, or circuit facilities to the left. |  |
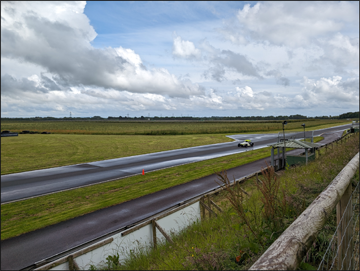
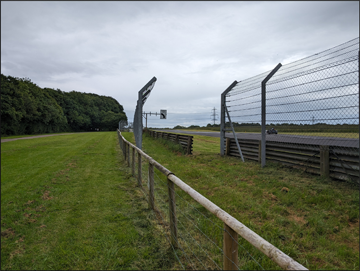 Looking forward towards Avon Rise, with a nice viewing point through the safety fencing. Looking forward towards Avon Rise, with a nice viewing point through the safety fencing. | 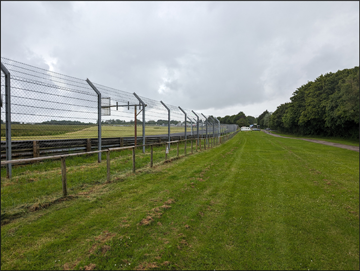 From the same point, looking back. From the same point, looking back. |
 At the end, there to the right is raised viewing. At the end, there to the right is raised viewing. | 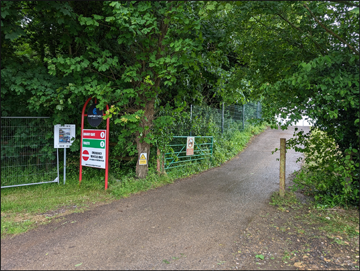 Circuit facilities can be less energetically reached by going to the left. Circuit facilities can be less energetically reached by going to the left. |
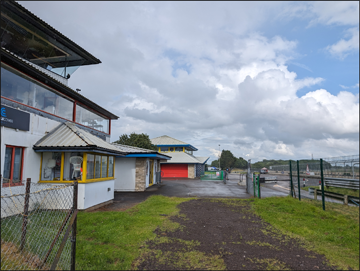
| 5. Avon Rise Back at a higher viewpoint, you can watch the marshals in action or use more circuit facilities, including toilets, a mobile caterer and a bar. | 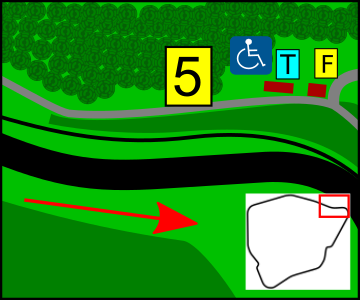 |
 The path up towards Avon Rise. The path up towards Avon Rise. | 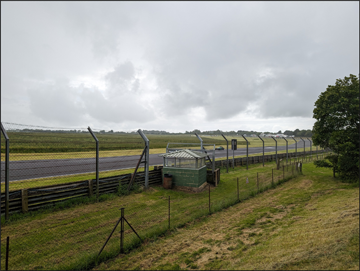 Looking back, through the marshals post. Looking back, through the marshals post. |
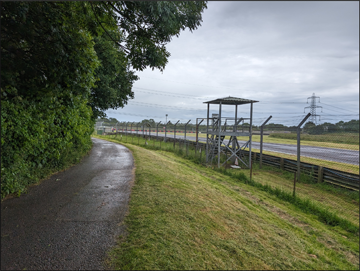 The same marshals post, this time looking forwards. The same marshals post, this time looking forwards. | 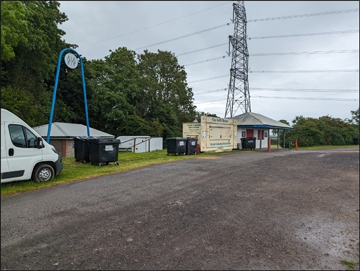 Circuit facilities. The toilets are on the left, then a mobile caterer and then a bar. Circuit facilities. The toilets are on the left, then a mobile caterer and then a bar. |
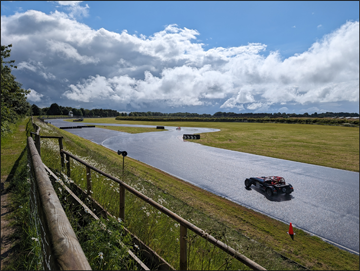
| 6. Quarry If you want a crash, this is the most likely spot to find one. When I had my big one, there was a polite audience and an ice cream van on the other side. For the less bloodthirsty, good battles can be found here as drivers fight for control over Avon Rise, then try to minimise tyre scrub through this corner, maximising traction towards the Esses. | 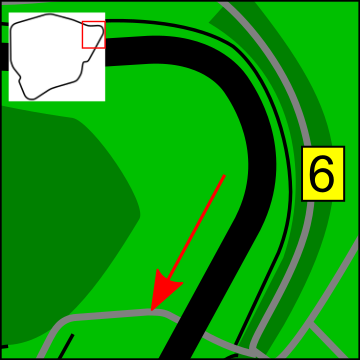 |
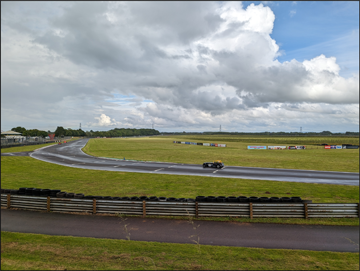
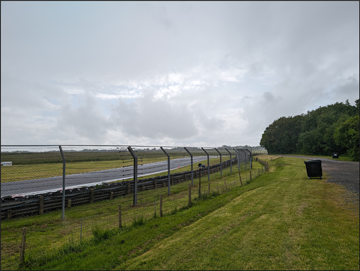 Looking back towards Avon Rise. Looking back towards Avon Rise. |  I arrived here just in time to photograph a big crash (no injuries), but declined the king offer. Having a lot of work to complete myself, I waited until the recovery was complete, but before repairs were finished. I arrived here just in time to photograph a big crash (no injuries), but declined the king offer. Having a lot of work to complete myself, I waited until the recovery was complete, but before repairs were finished.This is a great place to watch the action. |
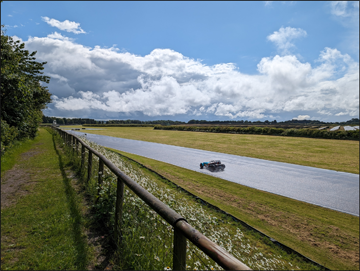
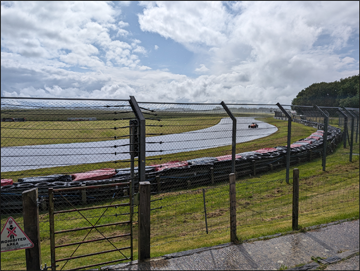 At Quarry exit, watching a very carefully driven Caterham in wet conditions. At Quarry exit, watching a very carefully driven Caterham in wet conditions. | 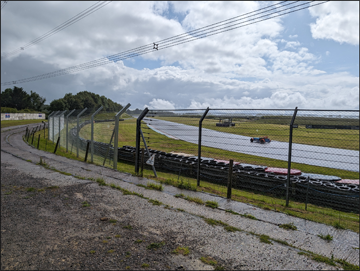 Another Caterham exiting Quarry. Another Caterham exiting Quarry. |
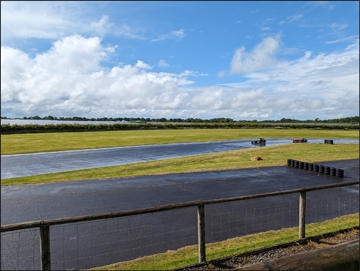
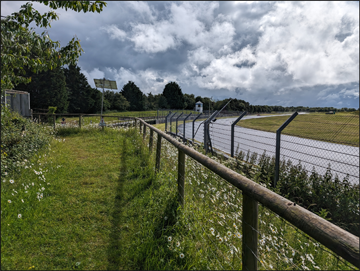
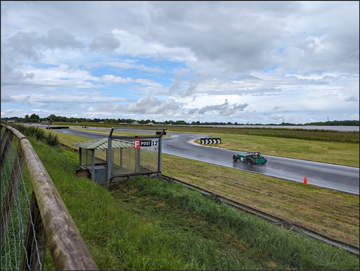
| 7. Farm Straight There are still decent views along here, but it isn’t as roomy as other spots. That can impair the view during a busy meeting. To get to this section, one needs to drop down to an access road, before climbing the next embankment. From Quarry, a driver can set up an overtake either into or out of the Esses. There can be many lines taken through the chicane, most of them wrong, but only an attentive spectator can judge well. | 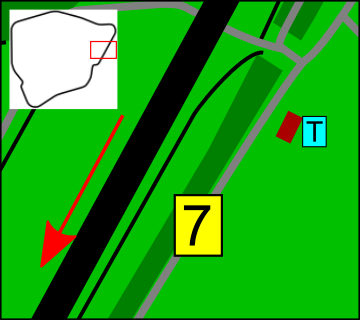 |
 From the far exit of Quarry. For the next section section, drop down to the access road, then walk up the next slope. From the far exit of Quarry. For the next section section, drop down to the access road, then walk up the next slope. |  Looking back at Quarry exit. Looking back at Quarry exit. |
 Looking towards the Esses. | 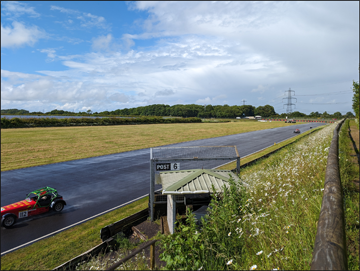 Now close the Esses. looking back at Quarry exit. Now close the Esses. looking back at Quarry exit. |
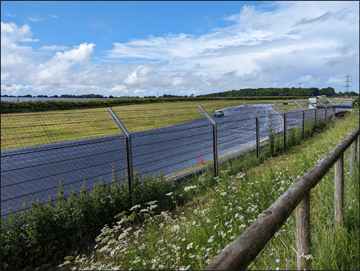
| 8. Esses Entry Again, not as roomy. It is still raised, so the action is good to watch. It’s clear from here which drivers make the best exit out of Esses, even if they can’t quite complete the pass at Gooch's. An outbraking manoeuvre may be achieved. | 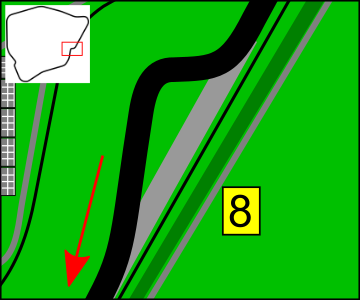 |
 Looking towards the Esses. Looking towards the Esses. | 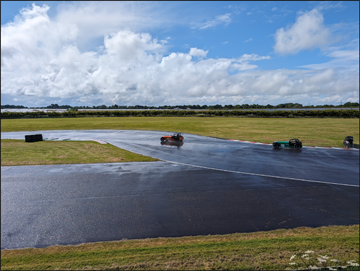 Caterhams enter the Esses. Caterhams enter the Esses. |
 Second apex of the Esses. Second apex of the Esses. | 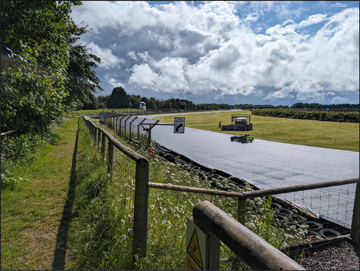 Exit of the Esses. Exit of the Esses. |
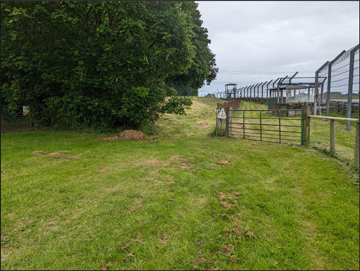
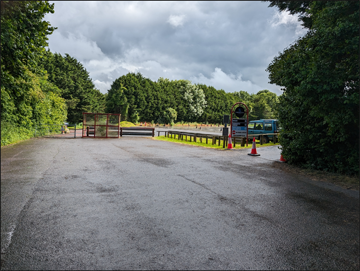
| 9. A Karting Detour Continuing the walk, one is taking away from the circuit via a bridge, which crosses the circuit’s perimeter access road. This quickly leads back to more raised viewing, but there is the potential for visiting a kart circuit. Here, we divert and quickly investigate the kart circuit, which was sadly closed during my visit. |  |
 By the entrance to the bridge, looking back at the exit of the Esses. By the entrance to the bridge, looking back at the exit of the Esses. | 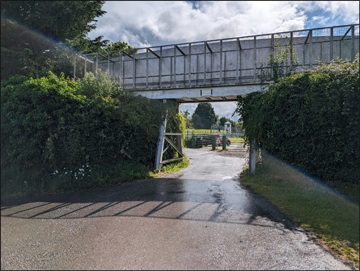 The bridge as it crosses the access road. Ahead is the kart circuit. The bridge as it crosses the access road. Ahead is the kart circuit. |
 Old Paddock Bend is ahead, with the white tower in the centre of the photograph being the karting building. The bridge can just be made out, centre-left. Old Paddock Bend is ahead, with the white tower in the centre of the photograph being the karting building. The bridge can just be made out, centre-left. | 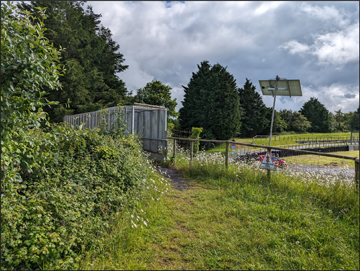 The bridge that needs to be crossed. The bridge that needs to be crossed. |
 Did I mention the skid pan? Oh, well here it is, with the entrance to the right. Did I mention the skid pan? Oh, well here it is, with the entrance to the right. |  The skid pan office. Pass here to get to the kart circuit. The skid pan office. Pass here to get to the kart circuit. |
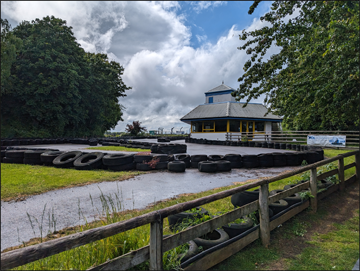 The kart circuit offices are seen ahead. The kart circuit offices are seen ahead. | 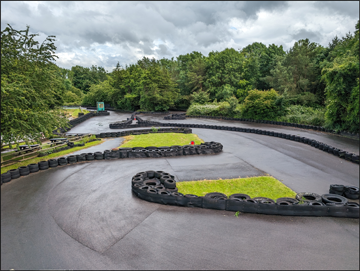 A view of the kart circuit by the white tower, looking away from the race circuit. A view of the kart circuit by the white tower, looking away from the race circuit. |
 A view of the kart circuit by the white tower, with the race circuit beyond. A view of the kart circuit by the white tower, with the race circuit beyond. |  From the white tower, with the race circuit beyond. From the white tower, with the race circuit beyond. |
| 10. Old Paddock Bend As an alternative to diverting to the kart circuit, one can have more raised viewing, between Old Paddock Bend and the white tower. | 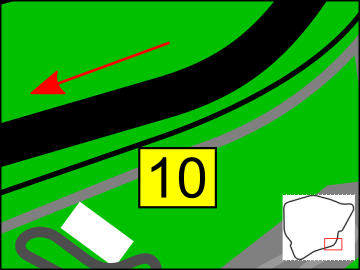 |
 From Old Paddock Bend, go up the grass bank for raised viewing. From Old Paddock Bend, go up the grass bank for raised viewing. | 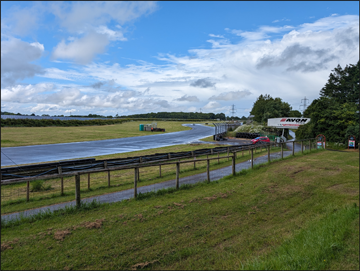 From the raised bank, looking back. From the raised bank, looking back. |
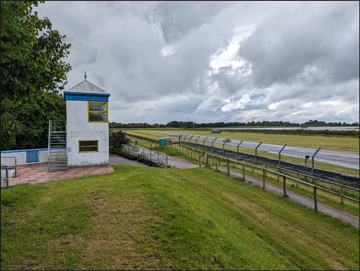 From the raised bank, looking forward, past the white tower. From the raised bank, looking forward, past the white tower. | 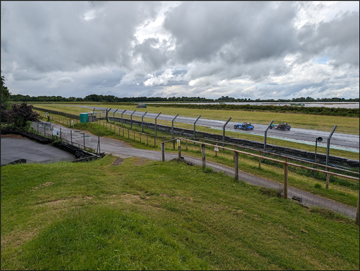 The end of the raised viewpoints for a short period, here as one passes by the hairpin bend of the kart circuit. The end of the raised viewpoints for a short period, here as one passes by the hairpin bend of the kart circuit. |
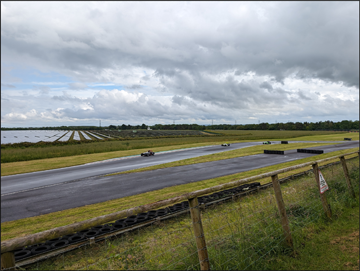
| 11. Howard's Way This short section does not have the most spectacular views as it is all at ground level. It can still entertain, though, as poor lines through the Esses generate passing opportunities all the way into Gooch's. | 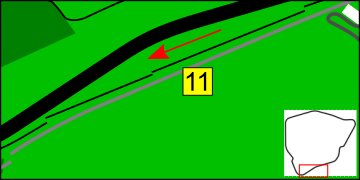 |
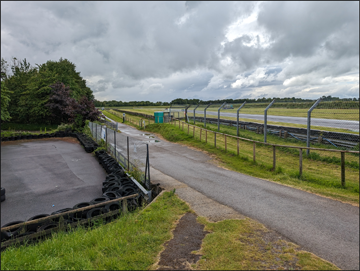 The end of the raised viewpoints for a short period, here as one passes by the hairpin bend of the kart circuit. The end of the raised viewpoints for a short period, here as one passes by the hairpin bend of the kart circuit. | 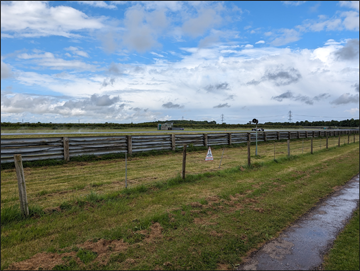 From ground level, looking back. From ground level, looking back. |
 Looking towards Gooch's, still at ground level. Looking towards Gooch's, still at ground level. | 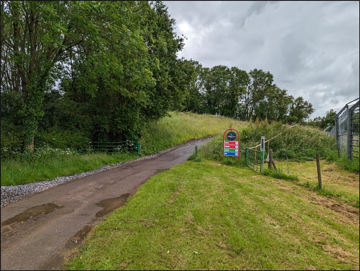 At Gooch's is the start of the next raised embankment. At Gooch's is the start of the next raised embankment. |
| 12. Gooch's Lots of action takes place here, partly because of driver disparity out of the Esses. But Gooch's is a challenge in its own right, providing even more entertainment. | 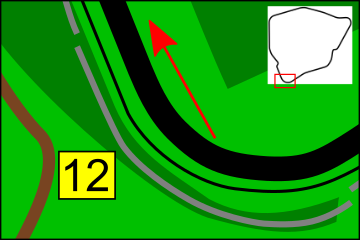 |
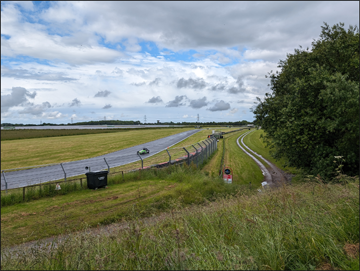 The entry to Gooch's. The entry to Gooch's. | 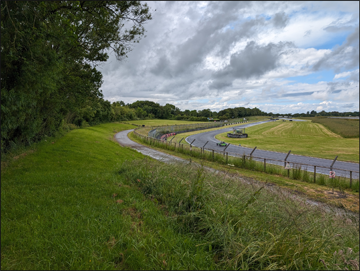 From not far along the embankment, looking forward. From not far along the embankment, looking forward. |
 From the exit of Gooch's, looking back … From the exit of Gooch's, looking back … | 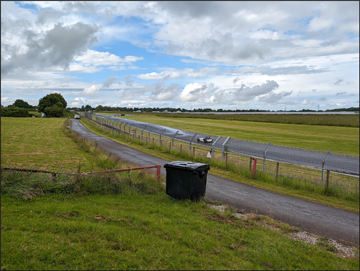 … and from the same point, looking forwards. … and from the same point, looking forwards. |
| 13. Facilities by Bobbies Here is a decent viewpoint, behind which are toilet and baby changing facilities. Here, there is plenty of space for parking and camping. | 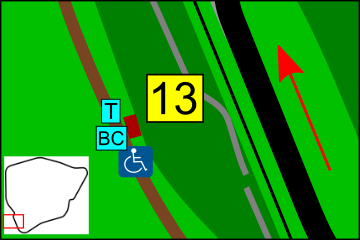 |
 Looking back towards Gooch's, from ground level. Looking back towards Gooch's, from ground level. |  Looking towards Bobbies. One can go on the grass, to the right, for raised viewing, or … Looking towards Bobbies. One can go on the grass, to the right, for raised viewing, or … |
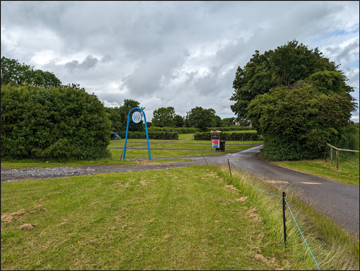 … behind Bobbies are paring and camping facilities … … behind Bobbies are paring and camping facilities … | 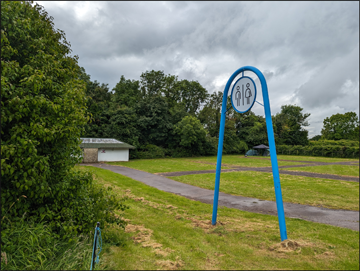 … along with toilets and baby changing facilities. … along with toilets and baby changing facilities. |
| 14. Bobbies Back to the racing, this is another spot that provides plenty of action. The author should know; he once got his braking totally wrong and wiped out the tyre wall on the apex, then watched cars behind scatter in avoidance of the ensuing rubber mayhem. | 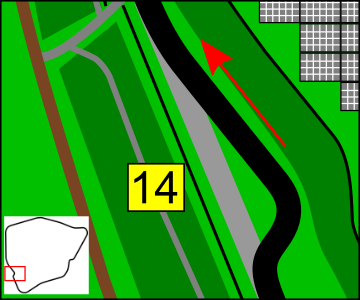 |
 Entering Bobbies. Entering Bobbies. | 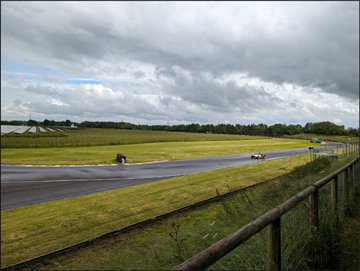 Looking back at cars entering Bobbies. Looking back at cars entering Bobbies. |
 Looking back at the exit of Bobbies … Looking back at the exit of Bobbies … | 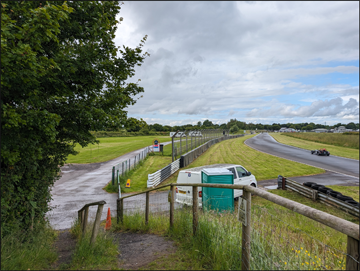 … Looking forward from the same point … Looking forward from the same point |
| 15. Dean Straight If a faster driver gets their timing correct, they can get a run on their prey out of Bobbies and towards Camp. | 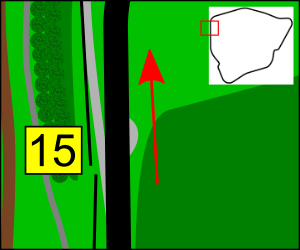 |
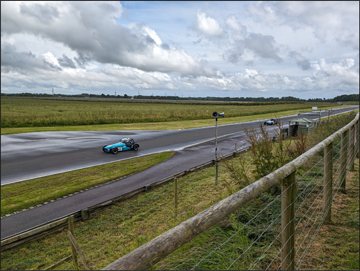
 From the start of the embankment, looking back. From the start of the embankment, looking back. | 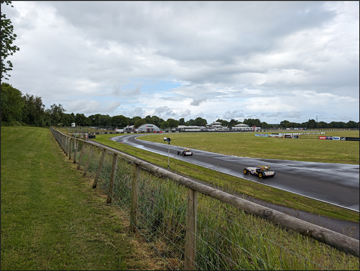 From the start of the embankment, looking forward. From the start of the embankment, looking forward. |
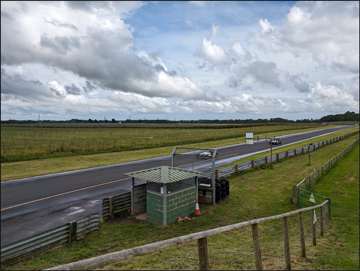
 By the entry to the pit lane. By the entry to the pit lane. | 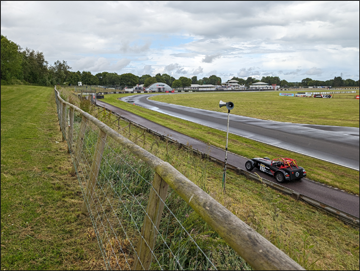 A Caterham driving along the pit entry lane. It is a considerable distance to the pits. A Caterham driving along the pit entry lane. It is a considerable distance to the pits. |
| 16. Camp A great, raised viewing point overlooking both Camp Corner and the Pit entry lane. This high-speed corner requires a little braking and that can lead to some sideways action. |  |
 A Caterham approaches Camp corner. A Caterham approaches Camp corner. | 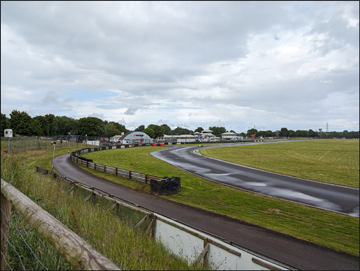 Camp corner, with the pit entry lane in the foreground. Camp corner, with the pit entry lane in the foreground. |
 Further around Camp corner, with the start/finish straight in the distance. Further around Camp corner, with the start/finish straight in the distance. | 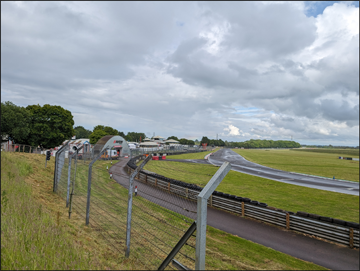 Towards the end of the spectating, with Camp corner and the start/finish straight visible. Towards the end of the spectating, with Camp corner and the start/finish straight visible. |
| 17. Return to the paddock On completing the tour, the spectator can reward themselves with an ice cream, before crossing the bridge and returning to the paddock. From there, it is a short walk back to the starting point. | 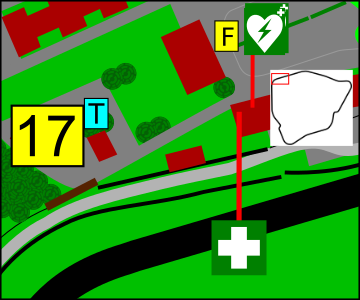 |
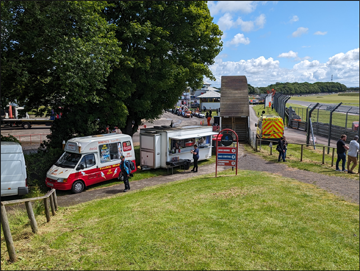 Drop down from the embankment for an ice cream or burger (or both?), before crossing the bridge. Drop down from the embankment for an ice cream or burger (or both?), before crossing the bridge.The pedestrian bridge can be seen between the burger van and the ambulance. | 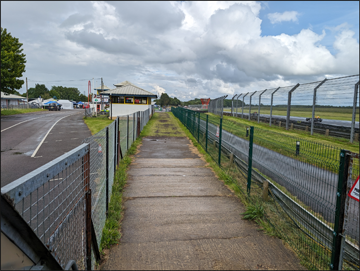 Dropping down from the pedestrian bridge, with the Assembly Area on the left and the pit entry lane on the right. Dropping down from the pedestrian bridge, with the Assembly Area on the left and the pit entry lane on the right. |
 On passing this building on the left, turn left for the paddock. On passing this building on the left, turn left for the paddock. | 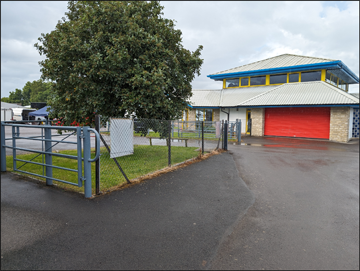 Turn left here, for the paddock. Turn left here, for the paddock. |
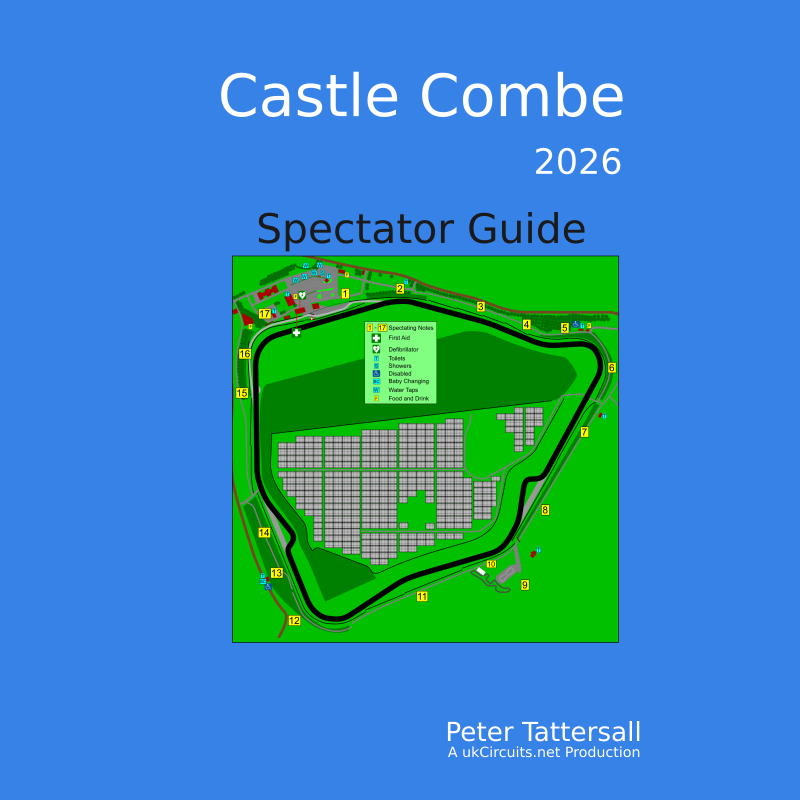
This Spectator Guide is available as a downloadable PDF at a very reasonable price. Click the thumbnail to view it in the store.
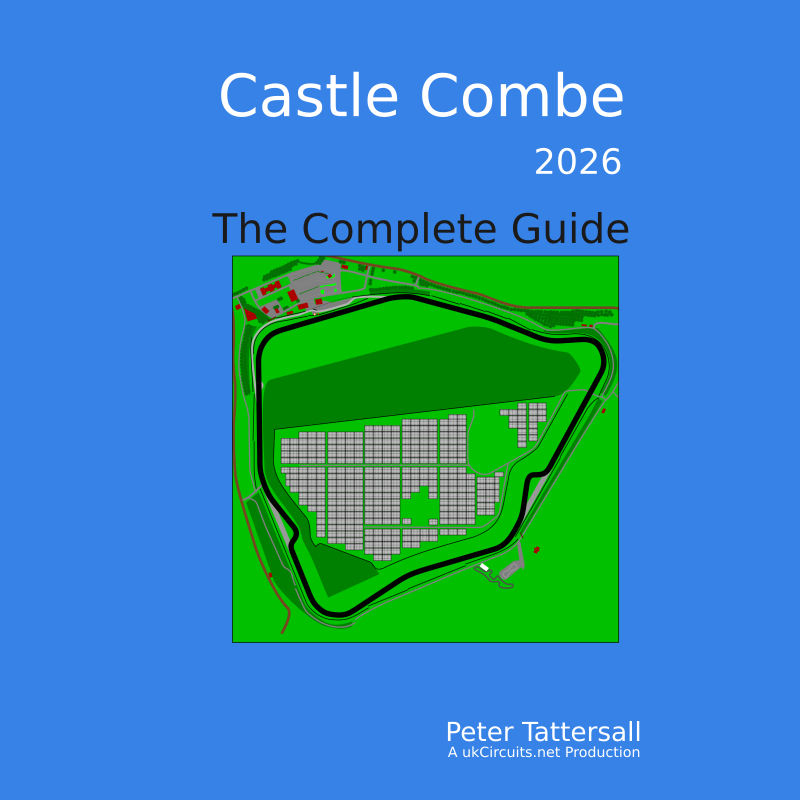
A Complete Guide of this venue is also available, which includes all of the above guides. Click the thumbnail to view it in the store.
You can also click this thumbnail to view all the available PDFs in the shop.
Page updated by Peter Tattersall, February 2026