The different configurations are detailed separately, and are
Full Configuration

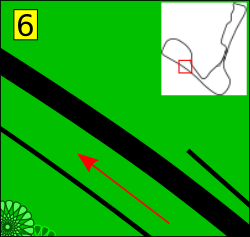
Not all marshal posts are necessarily in use. As a minimum, each post should be visible to the marshals at the next post, in both directions. For example, Post 5 can see posts 4 and 6.
The green flag lap is a sighting lap and one of its intended uses is for the driver to learn the position of all manned posts.
Above is a map of the circuit, showing the marshal posts for this configuration. Below, they are described in more detail.
Please note that the positions are a guideline only. Whilst every effort has been made to ensure accuracy, there may be mistakes or updates since the guide was created. Any feedback is appreciated.
In summary, while not guaranteeing perfection, I have identified the post positions along with repeater lights. Again, note that not all posts may be in use, while other posts may not have been used for flagging during my visits. Also, since writing, posts may have been moved or added. This is just a guide, but hopefully a useful guide.
Important Notes
I have been unable to walk the circuit since starting this guide. I intend to take photographs on my next visit. I will also confirm all post numbers.
The post numbers given here reflect my observations on watching back race videos from my own onboard footage. Some of those numbers were indistinct, while others were not visible at all. I got most, though, with questions only arising from those that I have listed as the following numbers:
Posts 2, 4, 8, 9, 21
While I am confident that the post numbers are correct, I have not physically read them. I will confirm this on my next visit.
Post 16A
While this post does exist, I need to confirm the correct number and that it is there solely for Assembly Area egress.
 Marshal Post 1: Coppice/Corral Situated opposite the apex of this fast uphill left-hand bend. It is shortly beyond the bridge, on the right, immediately after the access road. |     |
 Marshal Post 2: Charlies Top On approaching the corner, look through the visual apex and you will see the post. Rounding the corner, it can clearly be seen outside the circuit, on the left. |     |
Marshal Post 3: Charlies Top This is clearly seen by the inside of circuit as you reach the midpoint of the two Charlie apexes. |    |
 Marshal Post 4: Charlies Gate On entering the final (hopefully second) apex, this post can be seen to the left, just as the bend starts to straighten. |     |
 Marshal Post 5: Park Dip As the tracks straightens and dips, a tyre wall can be seen on the inside, right, protecting this post, which is next to the track. |    |
 Marshal Post 6: Park Straight Two thirds along park straight (curve) approaching park corner. It is by the track, on the left, on the brow of the hill. |     |
 Marshal Post 7: Park Corner This sharp right hander requires braking after the previous long straight. Once at the rises summit, the post can be seen clearly ahead on the left, opposite the apex kerb. | 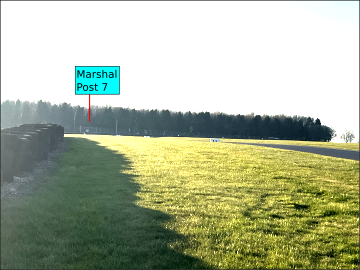   |
 Marshal Post 8: Park Corner Exit / Chris Curve Entry At the apex of Park Corner, this post can be seen directly ahead, across the grass, on the outside (left) of the circuit. |   |
 Marshal Post 9: This post does not appear directly ahead in the eyeline until late in the curve. Again, it is on the outside (left of the track). |   |
 Marshal Post 10: As the track momentarily straightens for the approach to Gooseneck, this post can be seen ahead, to the right, on the inside of the circuit. |    |
Post 11: Gooseneck On taking the right to enter Gooseneck, this post can be seen immediately ahead, of the right. It is opposite the left apex. |   |
 Marshal Post 12: Mansfield Located at the bottom of this steep downhill straight, on the right. It is next to the run-off. | 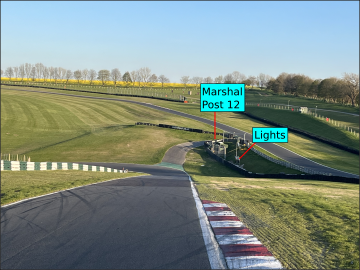   |
 Marshal Post 13: Chicane The bus stop chicane is just before the kink, at the start of which is this post. I understand that it is not used for cars. Marshal Post 14: Corral The bus stop chicane is just before the kink. Towards the end of the chicane, set back, is this post. It is not directly in the eyeline, so a little care is required in spotting it. |     |
 Marshal Post 15: Mountain Bottom On the approach to the entry, this post can be seen ahead and to the right. It is where the Armco, running parallel to the track, is intercepted by the tyre wall. |     |
 Post 16 - Mountain Top On the left, at the crest of the Mountain. It is at the end of the grandstand. |   |
 Assembly Area Exit There is a post located at the end of the Assembly Area exit road. It is to control competitor’s leaving the Assembly Area, so do not be distracted by its absence of flags. Post 17 - Hall Bends In Opposite the first apex (to the right) of Hall Bends. |    |
 Post 18 - Hall Bends Opposite the third apex (the second apex to the right) of Hall Bends. It is set back and not directly in the eyeline, so a little care is required in spotting it. |    |
 Post 19 - Hairpin On exiting the final apex of Hall Bends, the post appears ahead, on the left, just as the Hairpin begins. |    |
 Post 20 - Barn Approach Rounding the hairpin, the post is ahead, on the left. It is just after an access road that cuts through the armco on the inside of the circuit, then another access road through the tyre wall by the post itself. |   |
Post 21 - Barn Corner This post can be seen once reaching the access road by the previous post. It is on the outside, left, of the circuit, opposite the end of the apex kerb. There is only around 65 metres between this and the precious post. |    |
 Post 22 - Pit lane Entrance This post is at pit lane entrance. It is at the very start of the concrete pit wall. |   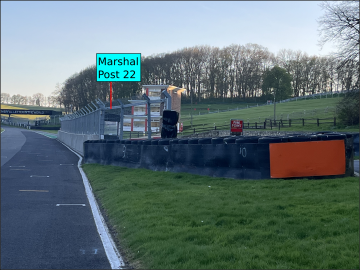  |
Go to guide for configuration:
Club Configuration

Not all marshal posts are necessarily in use. As a minimum, each post should be visible to the marshals at the next post, in both directions. For example, Post 5 can see posts 4 and 6.
The green flag lap is a sighting lap and one of its intended uses is for the driver to learn the position of all manned posts.
Above is a map of the circuit, showing the marshal posts for this configuration. Below, they are described in more detail.
Please note that the positions are a guideline only. Whilst every effort has been made to ensure accuracy, there may be mistakes or updates since the guide was created. Any feedback is appreciated.
In summary, while not guaranteeing perfection, I have identified the post positions along with repeater lights. Again, note that not all posts may be in use, while other posts may not have been used for flagging during my visits. Also, since writing, posts may have been moved or added. This is just a guide, but hopefully a useful guide.
Important Notes
I have been unable to walk the circuit since starting this guide. I intend to take photographs on my next visit. I will also confirm all post numbers.
The post numbers given here reflect my observations on watching back race videos from my own onboard footage. Some of those numbers were indistinct, while others were not visible at all. I got most, though, with questions only arising from those that I have listed as the following numbers:
Posts 2, 4, 8, 9
While I am confident that the post numbers are correct, I have not physically read them. I will confirm this on my next visit.
Marshal Post 1: Coppice/Corral Situated opposite the apex of this fast uphill left-hand bend. It is shortly beyond the bridge, on the right, immediately after the access road. | |
Marshal Post 2: Charlies Top On approaching the corner, look through the visual apex and you will see the post. Rounding the corner, it can clearly be seen outside the circuit, on the left. | |
Marshal Post 3: Charlies Top This is clearly seen by the inside of circuit as you reach the midpoint of the two Charlie apexes. | |
Marshal Post 4: Charlies Gate On entering the final (hopefully second) apex, this post can be seen to the left, just as the bend starts to straighten. | |
Marshal Post 5: Park Dip As the tracks straightens and dips, a tyre wall can be seen on the inside, right, protecting this post, which is next to the track. | |
Marshal Post 6: Park Straight Two thirds along park straight (curve) approaching park corner. It is by the track, on the left, on the brow of the hill. | |
Marshal Post 7: Park Corner This sharp right hander requires braking after the previous long straight. Once at the rises summit, the post can be seen clearly ahead on the left, opposite the apex kerb. | |
Marshal Post 8: Park Corner Exit / Chris Curve Entry At the apex of Park Corner, this post can be seen directly ahead, across the grass, on the outside (left) of the circuit. | |
Marshal Post 9: This post does not appear directly ahead in the eyeline until late in the curve. Again, it is on the outside (left of the track). | |
Marshal Post 10: As the track momentarily straightens for the approach to Gooseneck, this post can be seen ahead, to the right, on the inside of the circuit. | |
Post 11: Gooseneck On taking the right to enter Gooseneck, this post can be seen immediately ahead, of the right. It is opposite the left apex. | |
Marshal Post 12: Mansfield Located at the bottom of this steep downhill straight, on the right. It is next to the run-off. | |
Marshal Post 13: Chicane The bus stop chicane is just before the kink, at the start of which is this post. I understand that it is not used for cars. Marshal Post 14: Corral The bus stop chicane is just before the kink. Towards the end of the chicane, set back, is this post. It is not directly in the eyeline, so a little care is required in spotting it. | |
 Marshal Post 15: Mountain Bottom On the approach to the entry, this post can be seen ahead and to the right. It is where the Armco, running parallel to the track, is intercepted by the tyre wall. | |
Go to guide for configuration:
Woodlands Configuration
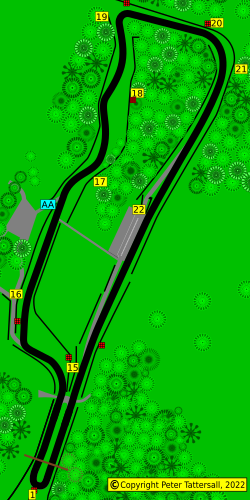
Not all marshal posts are necessarily in use. As a minimum, each post should be visible to the marshals at the next post, in both directions. For example, Post 15 can see posts 14 and 16.
The green flag lap is a sighting lap and one of its intended uses is for the driver to learn the position of all manned posts.
Above is a map of the circuit, showing the marshal posts for this configuration. Below, they are described in more detail.
Please note that the positions are a guideline only. Whilst every effort has been made to ensure accuracy, there may be mistakes or updates since the guide was created. Any feedback is appreciated.
In summary, while not guaranteeing perfection, I have identified the post positions along with repeater lights. Again, note that not all posts may be in use, while other posts may not have been used for flagging during my visits. Also, since writing, posts may have been moved or added. This is just a guide, but hopefully a useful guide.
Important Notes
I have been unable to walk the circuit since starting this guide. I intend to take photographs on my next visit. I will also confirm all post numbers.
The post numbers given here reflect my observations on watching back race videos from my own onboard footage. Some of those numbers were indistinct, while others were not visible at all. I got most, though, with questions only arising from those that I have listed as the following numbers:
Posts 16A
While this post does exist, I need to confirm the correct number and that it is there solely for Assembly Area egress.
Post 21
While I am confident that the post number is correct, I have not physically read it. I will confirm this on my next visit.
 Marshal Post 1: Hairpin The hairpin right is just after the bridge that follows the pit straight. This post is opposite the apex of the hairpin. The turn in for the hairpin can be seen as the access road on the right, just after the bridge. These photographs were taken from the Full configuration, as there is no difference in the positioning of the marshal post. | |
Marshal Post 15: Mountain Bottom On the approach to the entry, this post can be seen ahead and to the right. It is where the Armco, running parallel to the track, is intercepted by the tyre wall. | |
Post 16 - Mountain Top On the left, at the crest of the Mountain. It is at the end of the grandstand. | |
Assembly Area Exit There is a post located at the end of the Assembly Area exit road. It is to control competitor’s leaving the Assembly Area, so do not be distracted by its absence of flags. Post 17 - Hall Bends In Opposite the first apex (to the right) of Hall Bends. | |
Post 18 - Hall Bends Opposite the third apex (the second apex to the right) of Hall Bends. It is set back and not directly in the eyeline, so a little care is required in spotting it. | |
Post 19 - Hairpin On exiting the final apex of Hall Bends, the post appears ahead, on the left, just as the Hairpin begins. | |
Post 20 - Barn Approach Rounding the hairpin, the post is ahead, on the left. It is just after an access road that cuts through the armco on the inside of the circuit, then another access road through the tyre wall by the post itself. | |
Post 21 - Barn Corner This post can be seen once reaching the access road by the previous post. It is on the outside, left, of the circuit, opposite the end of the apex kerb. There is only around 65 metres between this and the precious post. | |
Post 22 - Pit lane Entrance This post is at pit lane entrance. It is at the very start of the concrete pit wall. | |
Go to guide for configuration:
Buy the PDF
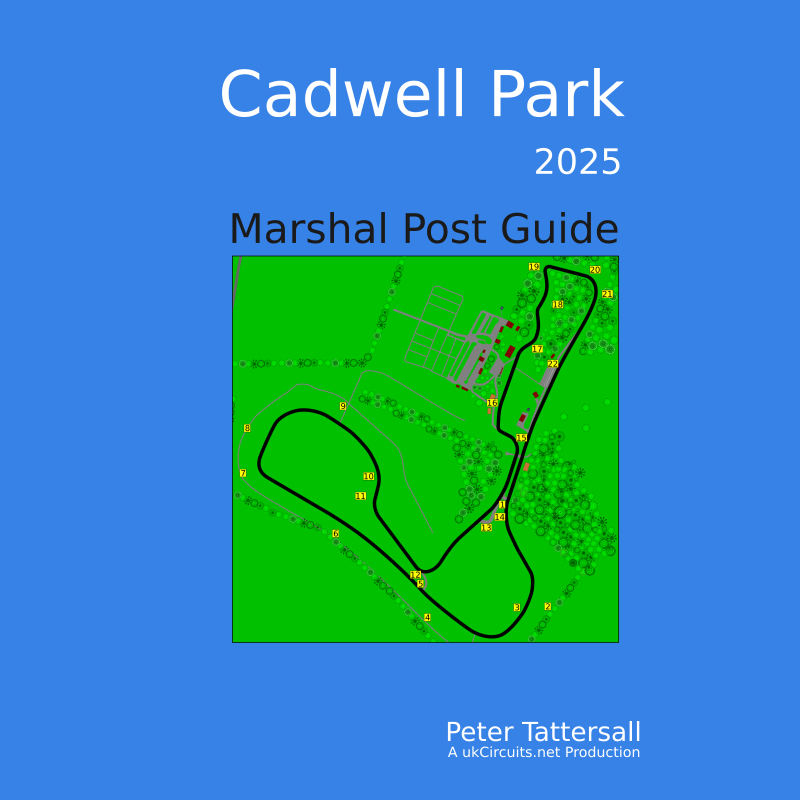
This Marshal Post Guide is available as a downloadable PDF at a very reasonable price. Click the thumbnail to view it in the store.
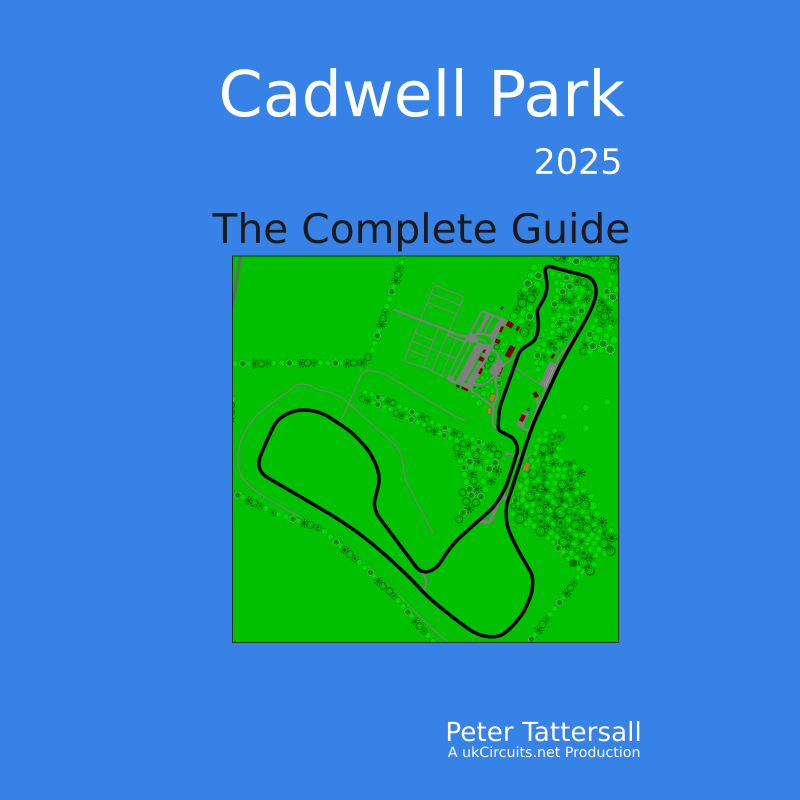
A Complete Guide of this venue is also available, which includes all of the above guides. Click the thumbnail to view it in the store.
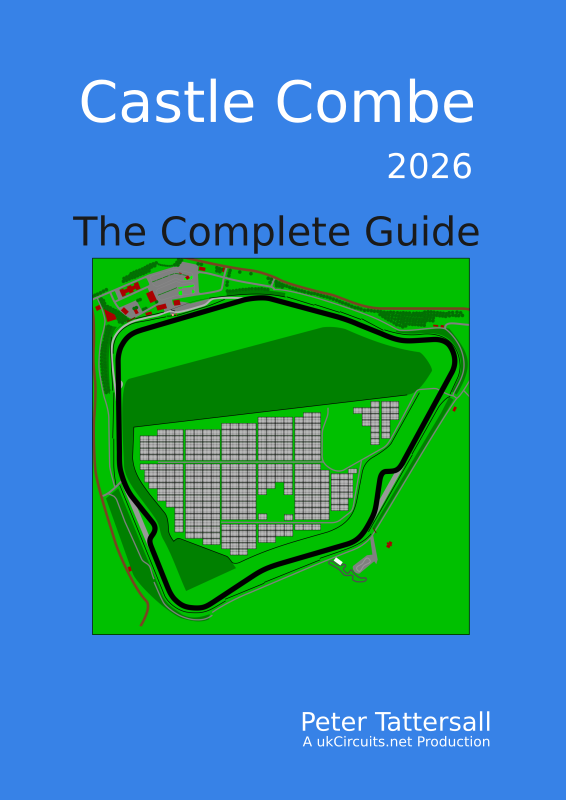
You can also click this thumbnail to view all the available PDFs in the shop.
Page updated by Peter Tattersall, August 2025