
This document details all the places a driver needs to take themselves or their car over a race weekend.
Guided Tour of Paddock
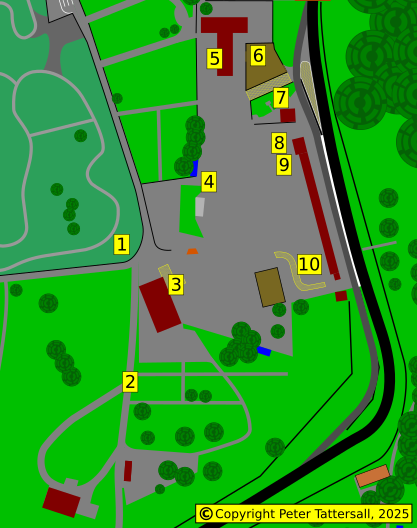
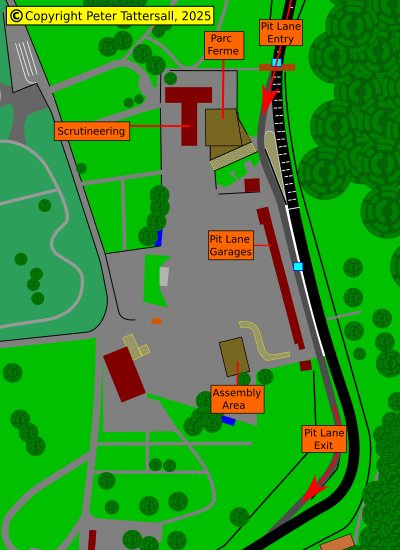
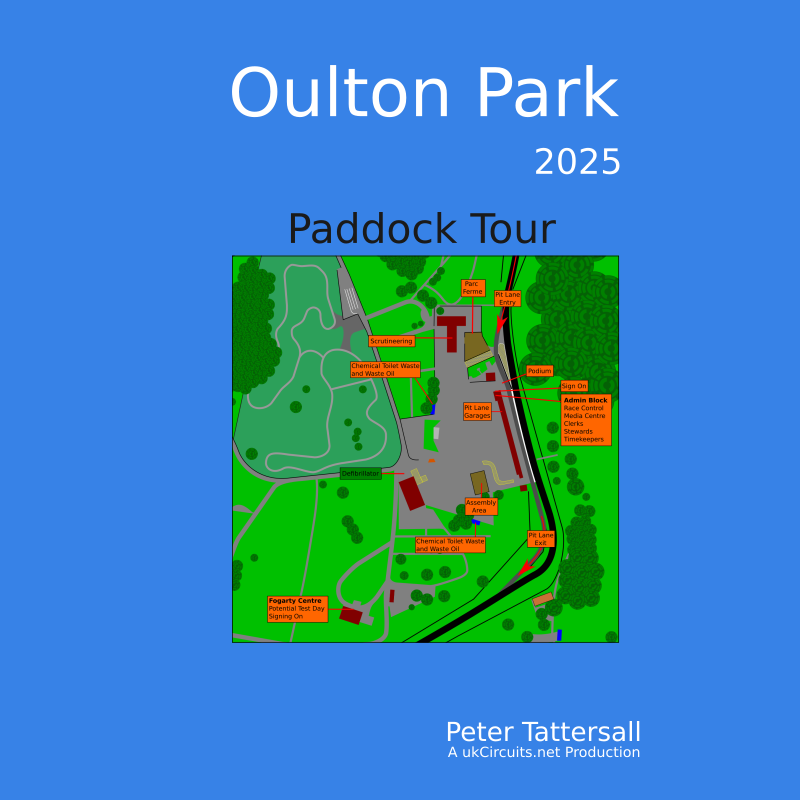
Take a guided tour around the paddock by starting at 1 in the map above and reading the notes in the table below.
| 1. Approach to the Main Entrance From the circuit entrance the main paddock entrance is ahead and on the left. Chequers restaurant is by the entrance. Continue straight on for the Fogarty Centre. | 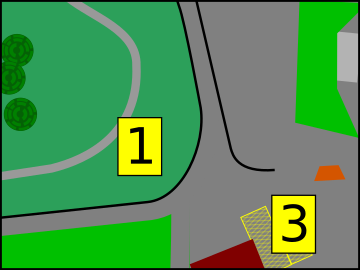 |
| Approach to the Main Entrance In the distance can be seen the Chequers restaurant; the entrance is on the left. Straight on leads to the Fogarty Centre. |  |
| Approach to the Main Entrance Here, turn left to enter the paddock. The Chequers restaurant is in the centre of this image. It is straight (bearing right slightly) to get to the Fogarty Centre. | 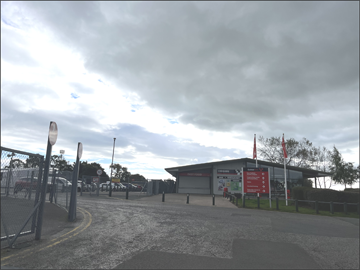 |
| 2. Fogarty Centre From the main paddock entrance continue straight on for the Fogarty Centre. | 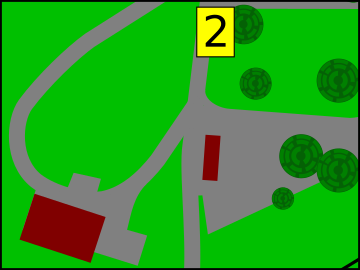 |
| Approach to the Fogarty Centre The Fogarty Centre is after the side road on the right. A toilet block is opposite the centre | 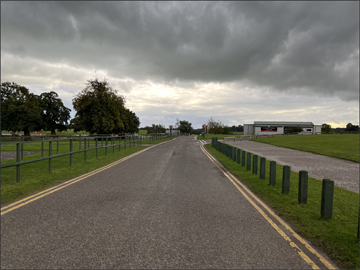 |
| Fogarty Centre and Toilets The approach to the Fogarty Centre on the right. The toilet block can be seen on the left. | 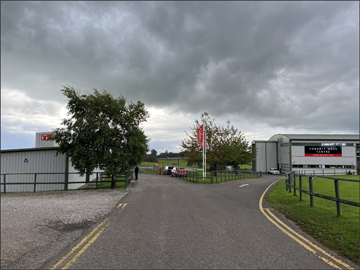 |
| Fogarty Centre There is limited parking opposite the entrance to the Fogarty Centre. | 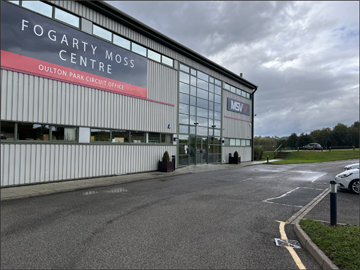 |
| 3. Chequers Restaurant The Chequers restaurant is by the paddock entrance, with the Defibrillator being located to the left of the restaurant entrance | |
| Chequers Restaurant Just on the inside of the paddock is the Chequers restaurant. Here is the approach to the main entrance. | 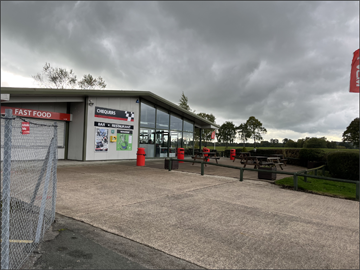 |
| Chequers Restaurant – Defibrillator The Defibrillator is located to the left of the main entrance to the Chequers Restaurant. | 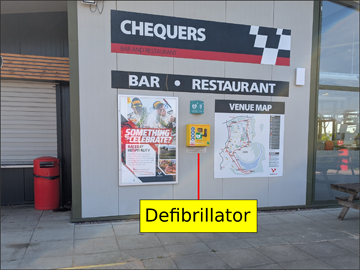 |
| Chequers Restaurant The main entrance. |  |
| Chequers Restaurant On entering the restaurant, hot food is available during busy periods. Here, the entrance is to the left, with the restaurant to the right. | 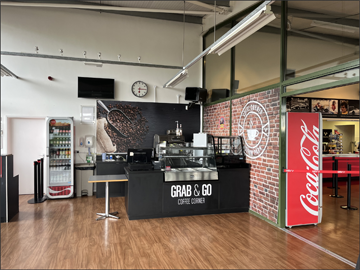 |
| Chequers Restaurant The servery is to the left, out of shot, with the bar further down, also to the left. The windows open up to allow access to outdoor seating. |  |
| 4. Fuel, Plus Oil and Toilet Waste A small fuel station is available during limited periods of the day. To the right are depositories for waste oil and portable toilet waste. | 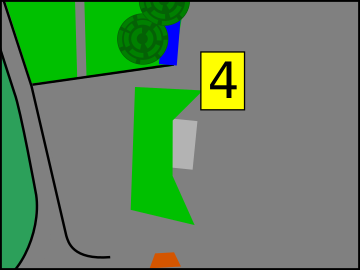 |
| Fuel and Waste A small fuel station is available during limited periods of the day. It is best not to assume that fuel will be available, particularly for smaller meetings. To the right of the fuel station is a depository for waste oil, alongside a portable toilet waste disposal point. | 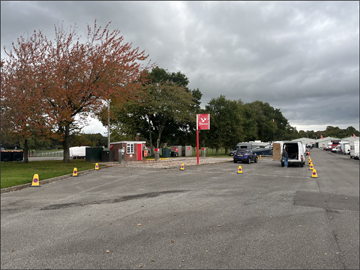 |
| Fuel A small fuel station is available during limited periods. | 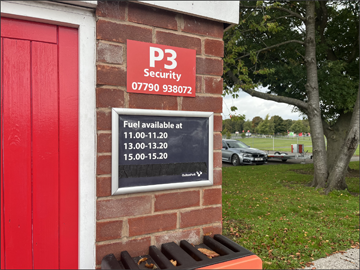 |
| Waste To the right of the fuel station, here are the depositories for waste oil, followed by the portable toilet waste disposal point. | 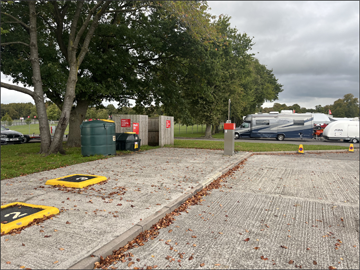 |
| 5. Scrutineering, Toilets and Showers At the far north of the paddock can be found the scrutineering bay, toilets and showers. | 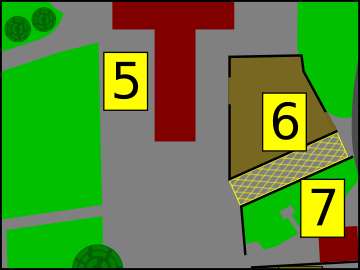 |
| Scrutineering, Toilets and Showers At the far north of the paddock can be found the scrutineering bay, at the end of which are toilets and showers. | 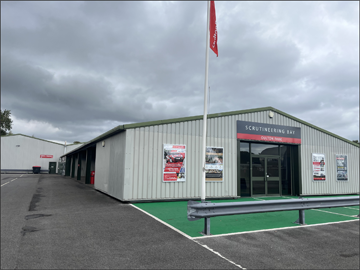 |
| Toilets and Showers At the end of the scrutineering bay are the toilets and showers. | 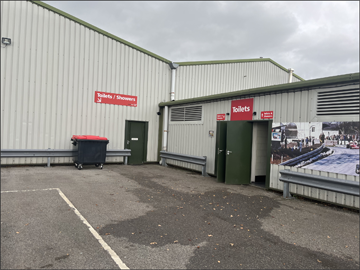 |
| Scrutineering This is the exit of the scrutineering bay. | 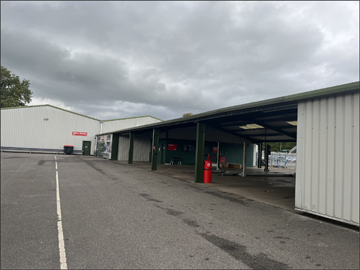 |
| Scrutineering The interior of the scrutineering bay. | 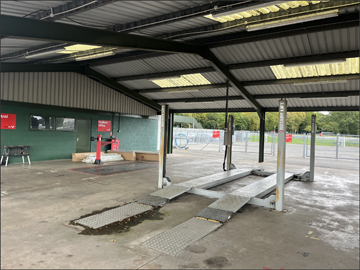 |
| 6. Parc Fermé Parc Fermé is at the other side of the scrutineering bay. | |
| Parc Fermé The exit from parc fermé. Ambulances can be seen in the compound of the medical centre, with Race Control to the right of the picture. | 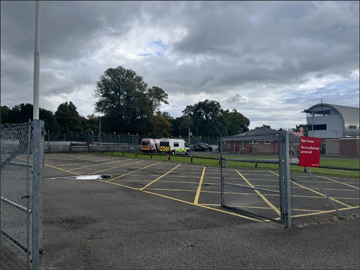 |
| Parc Fermé From the centre of the scrutineering bay, looking towards parc fermé. | 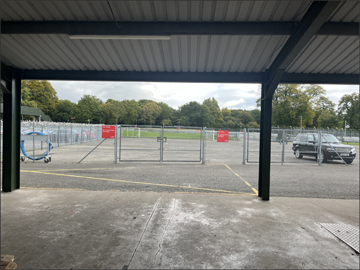 |
| Parc Fermé Parc fermé is to the left of the fence, with the exit being ahead, by the pole. Race Control can be seen ahead, the raised structure overlooking the pit lane. The medical centre is in front of Race Control. | 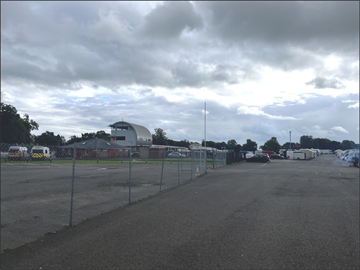 |
| 7. Medical Centre Located between parc fermé and Race Control. | |
| Entrance to the Medical Centre Walking past parc fermé, we come across the entrance to the medical centre. | 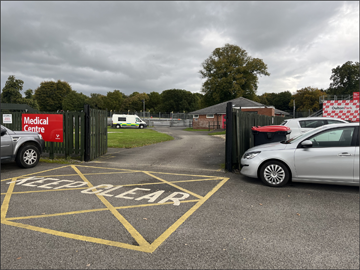 |
| Medical Centre Entrance At the side of the medical centre, is the entrance. Note the armco that separates the medical centre from the pit lane. | 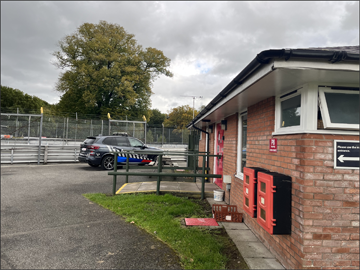 |
| Medical Centre Entrance The entrance to the medical centre. | 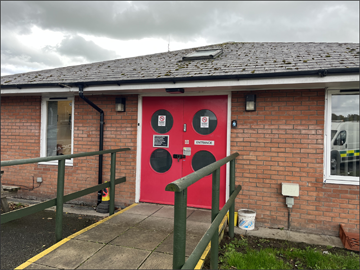 |
| 8. Podium, Water and Race Control Between the medical centre and Race Control are water taps and the podium. | 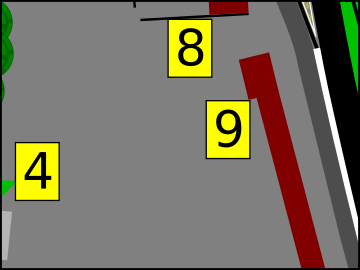 |
| Podium and Water After the medical centre, on our way to Race Control, we pass water taps and the podium. | 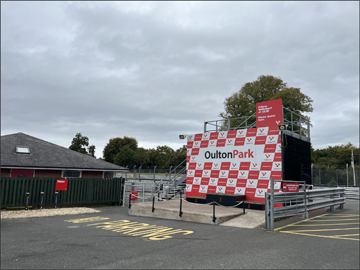 |
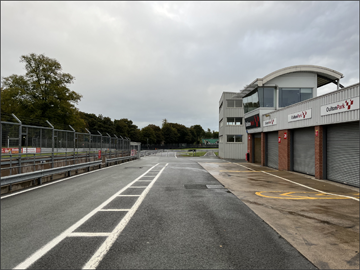
| Race Control From the podium, Race Control can be seen ahead. To the right of Race Control, looking from the paddock, are a set of toilets, then the garages. |  |
| Race Control Another view of Race Control, this time from the pit entry lane. Race control is attached to the garages, to the left, with toilets between. | 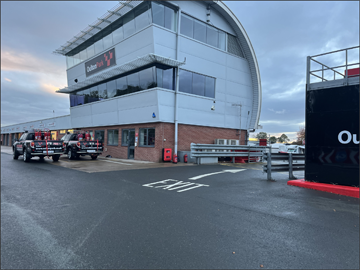 |
| Race Control Entering Race Control, this time from the paddock, directions are provided for various officials on the first floor, with the Media Centre on the second. | 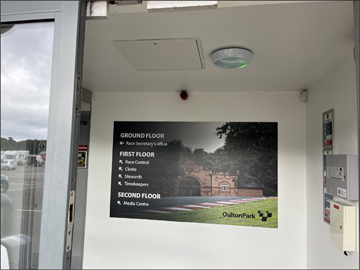 |
| 9. Toilets and Garages The toilets are between Race control and the garages. There is a path leading directly to the pit lane. | |
| Toilets The toilets are between Race control and the garages. There is a path leading directly to the pit lane. | 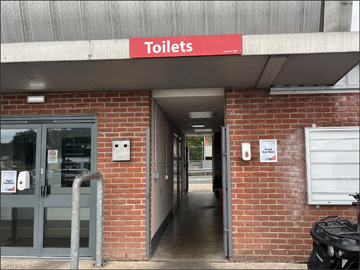 |
| Garages The garages cover the majority of the pit lane, all the way to the Assembly Area and the start of the pit exit lane. | 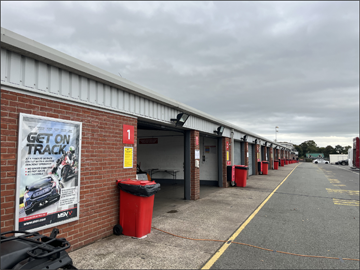 |
| 10. Assembly Area Looking from the garages, the Assembly Area can be seen on the other side of the fencing. | 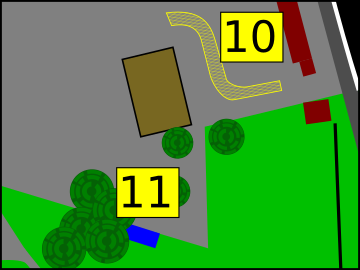 |
| Assembly Area Looking from the garages, the Assembly Area can be seen on the other side of the fencing. To access the Assembly Area from here, drive towards it and turn right at the fence. At the end of the fence turn left and the entrance is ahead, on the left. | 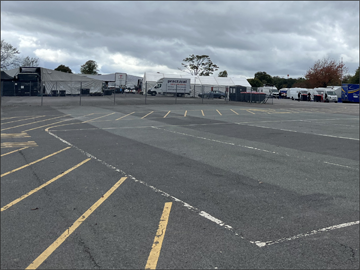 |
| Assembly Area Entrance There is a marshal’s box to the left of the entrance, where noise testing can take place. | 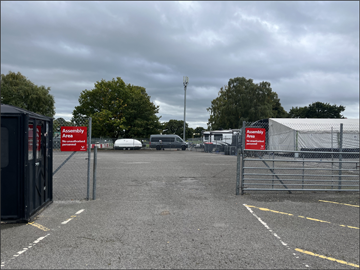 |
| 11. Toilet Waste On the other side of, the Assembly Area from the main paddock is a toilet waste disposal point. | |
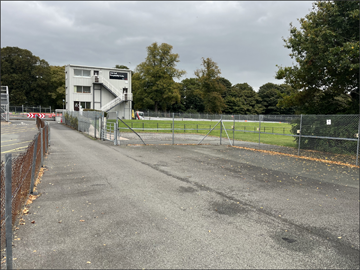
| Toilet Waste On the other side of, the Assembly Area from the main paddock is a toilet waste disposal point. From here, turning a little over 90 degrees to the left, you will see Race Control in the distance. | 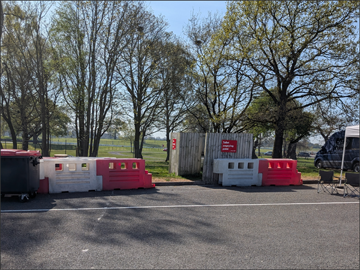 |
| Toilet Waste Race Control can be seen in the distance, with the Assembly Area to the left. | 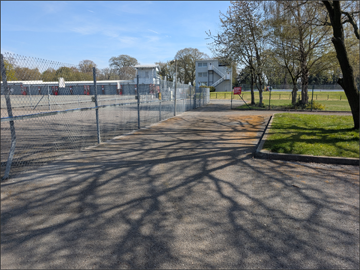 |
Pits, Including Entry and Exit
Access from the Assembly Area
Looking South, from the garages, the Assembly Area can be seen ahead and to the right.
To access the Assembly Area from here, drive towards it and turn right at the perimeter fence, at the end of which, turn left and the entrance is ahead, on the left. There is a marshal’s box to the left of the entrance, where noise testing can take place.
Looking ahead from the entrance, the exit that leads to the pit lane can be seen. Marshals will direct you down there. At the end of that lane, with a three-storey hospitality suite on the right, is the pit lane; turning right will put you on the pit exit lane.
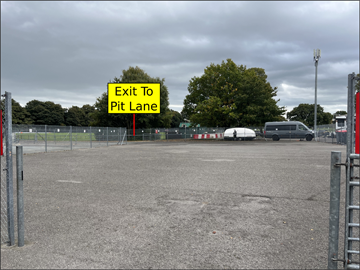 Access to the Assembly Area, from the southern end of the paddock. Access to the Assembly Area, from the southern end of the paddock.From the entrance, the exit to the pit lane is ahead. | 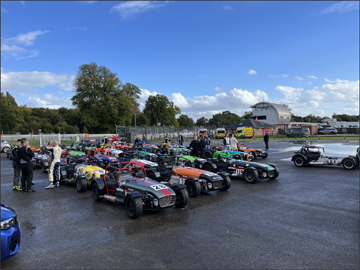 The Assembly Area. The Assembly Area. |
 From the Assembly Area, head towards the hospitality suite. There, turn right for the pit exit lane. From the Assembly Area, head towards the hospitality suite. There, turn right for the pit exit lane. | 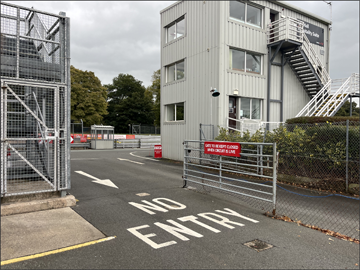 Turn right for the pit exit lane. Turn right for the pit exit lane.Notice the left side is a return lane from the pit lane. |
Pit Lane Entry
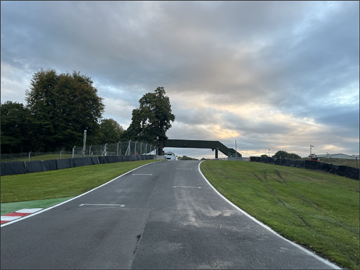
The pit lane entry is shortly after Lodge Corner. From there, move to the right side of the circuit and, in time for the pedestrian bridge that crosses the circuit at the rise of the hill, raise a hand in warning. Be aware of any flags waved at the marshal post by the bridge and reduce speed cautiously.
It is initially a straight entrance, but there is a bend to the left just as one reaches the armco, just after the painted white-striped zone that initially separates pit lane from race track.
Just before the armco begins, there is an opening to the right for parc ferme or returning to the paddock. If you are likely to need to turn right here, especially in qualifying or racing, be especially careful with your pace.
From the pit lane, there is another entry into the paddock, this time after the garage block. Be careful there, as cars may be joining the pit lane from the paddock.
Be aware of the speed limit which, while normally 60kph, may be slower at such events as truck meetings.
 The final corner, Lodge, is fast, but on exit there is time to move to the right and raise a hand to indicate that you are pitting. The final corner, Lodge, is fast, but on exit there is time to move to the right and raise a hand to indicate that you are pitting. | 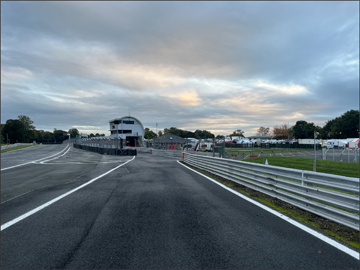 The entry is at high-speed. Ensure that you slow down to the speed limit by the time you are on the pit lane. The entry is at high-speed. Ensure that you slow down to the speed limit by the time you are on the pit lane. |
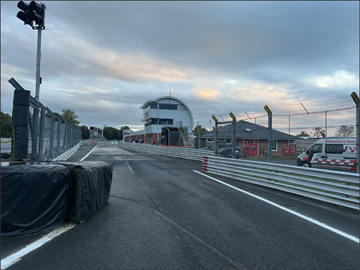 The pit lane is ahead. The pit lane is ahead. | 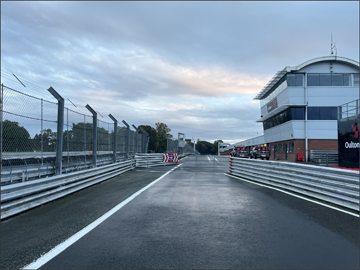 Here, the entry to the pit lane is closed. When live, competitors can turn immediate right, by the Control Centre to return to the paddock, or go straight on for the pit lane and garages. Here, the entry to the pit lane is closed. When live, competitors can turn immediate right, by the Control Centre to return to the paddock, or go straight on for the pit lane and garages. |
Pit Lane and Garages
The speed limit encompasses the whole of the pit lane, starting from a little before Race Control and ending after the hospitality suite, which is the final building along this stretch.
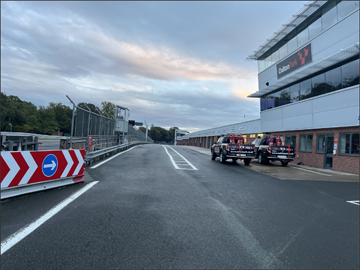 The start of the pit lane. The start of the pit lane. |  Turn right, by the Control Centre, to return to the paddock. Turn right, by the Control Centre, to return to the paddock. |
 The pit lane and garages. The pit lane and garages. | 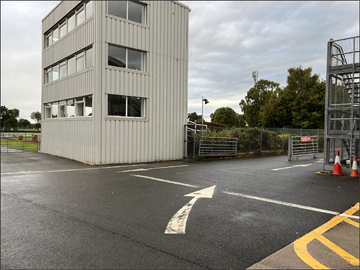 At the far end of the pit lane, between the end of the garages and the hospitality suite, one can turn right to return to the paddock. At the far end of the pit lane, between the end of the garages and the hospitality suite, one can turn right to return to the paddock.Stay to the right, as the left lane is for competitor access to the pit exit lane. |
Pit Exit
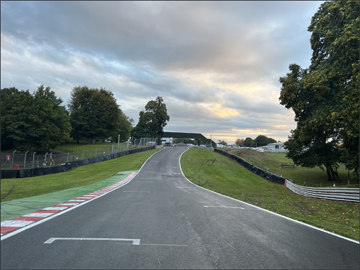
Obey the lights and join safely. The pit lane exit curves sharply to the right as it cuts the apex of the first corner, Old Hall.
On joining the circuit, stay right until confident that there is nothing on the racing line. The first flag post is just a little ahead, on the right. It is immediately after the corner marker board.
 From the pit lane, ahead can be seen the pit exit lane. The hospitality suite is the final building on the right. From the pit lane, ahead can be seen the pit exit lane. The hospitality suite is the final building on the right. | 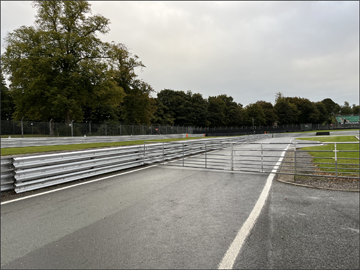 Alongside the hospitality suite. Access to the circuit is currently closed. Alongside the hospitality suite. Access to the circuit is currently closed. |
 The pit exit lane curves tightly, so take care. The pit exit lane curves tightly, so take care. |  Merge onto the race circuit at the exit of the first corner, Lodge. The exit kerb is opposite this point, but still be wary of fast-moving competitors. Merge onto the race circuit at the exit of the first corner, Lodge. The exit kerb is opposite this point, but still be wary of fast-moving competitors. |
Grid and Start Lights
Starting Grid – Rear
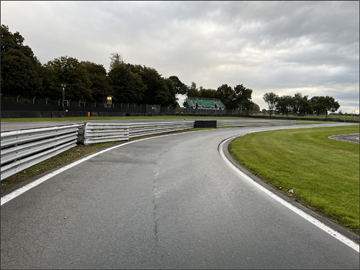
Exiting Lodge Corner, slow down as the starting grid is straight ahead. Last place on the starting grid is only a few car-lengths ahead of the end of the gravel trap.
Starting Grid – Rear
Just after the end of the painted white-striped zone, that initially separates pit lane from race track, is where the head of the grid is located. This is shortly after the start of the concrete pit wall, alongside Race Control.
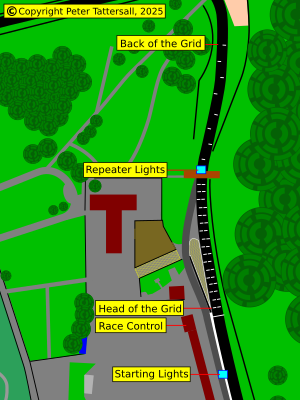
Starting Lights
The starting lights can be seen on a gantry, almost at the midpoint of the garage block.
Repeater lights
Located at the centre of the pedestrian bridge.
 The rear of the grid. The bridge, ahead has central starting lights. The rear of the grid. The bridge, ahead has central starting lights. | 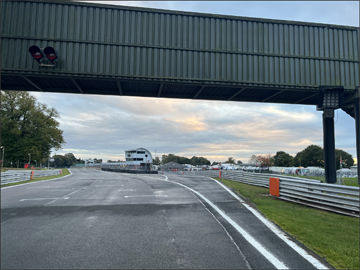 The pedestrian bridge, with the central starting lights. There are also flag lights visible, to the right. The pedestrian bridge, with the central starting lights. There are also flag lights visible, to the right. |
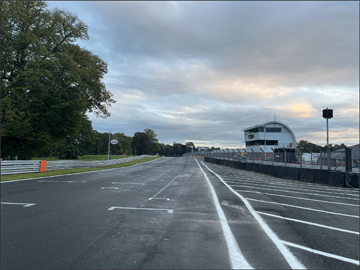 The view to the front, from alongside pit entry. Not the flag lights by pit entry. The view to the front, from alongside pit entry. Not the flag lights by pit entry. | 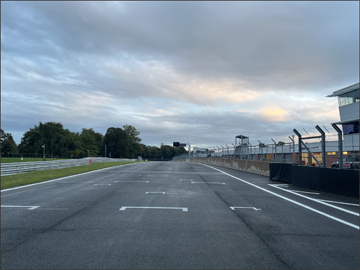 The front of the grid is alongside Race Control, with the starting lights ahead, on the right. The front of the grid is alongside Race Control, with the starting lights ahead, on the right. |
Medical Centre / First Aid and the Defibrillator
This information has already been provided in the general paddock tour, above, but is separated out into this section to make this important information easier to locate.
Medical Centre
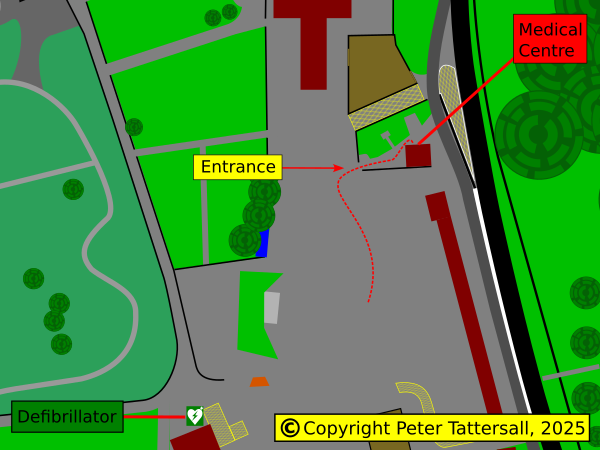
From the paddock, head to the left the garage block, at the end of which is Race Control, then a gap, followed by the Medical Centre compound. The entrance into the compound is at the southwest corner.
| Entrance to the Medical Centre This is the entrance to the medical centre compound. Inside, an ambulance can be seen to the left of the entrance to the facility. | |
| Medical Centre Entrance At the side of the medical centre, is the entrance. Note the armco that separates the medical centre from the pit lane. | |
| Medical Centre Entrance The entrance to the medical centre. What3Words The What3Words location for the medical centre is: ///obtain.sped.stored | |
Defibrillator
The defibrillator is located by the entrance to the Chequers restaurant, which is by the main entrance to the paddock.
| Chequers Restaurant Just on the inside of the paddock is the Chequers restaurant. To the left of the main entrance is the defibrillator | |
| Chequers Restaurant – Defibrillator The Defibrillator is located to the left of the main entrance to the Chequers Restaurant. What3Words The What3Words location for the medical centre is: ///alarm.described.dine | |
Buy the PDF
This Paddock Tour is available as a downloadable PDF at a very reasonable price. Click the thumbnail to view it in the store.
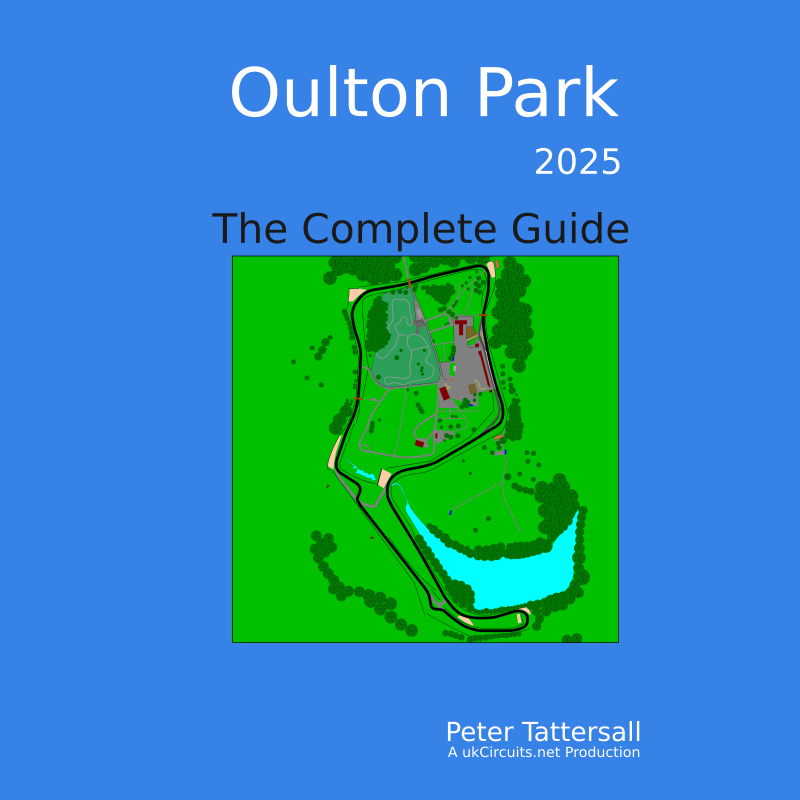
A Complete Guide of this venue is also available, which includes all of the above guides. Click the thumbnail to view it in the store.

You can also click this thumbnail to view all the available PDFs in the shop.
Page updated by Peter Tattersall, August 2025